Progressive layer masking, Blending modes - Mr Adam
Our main task by the end of the semester is to do a movie poster in which this assignment helped alot.
We made a poster of an abandoned bus where we were supposed to be focused on it just being abandoned but when you get into something, you get carried away. also i love zombies.
Shall we?
Here we have a bus which we worked on.
AAND THIS my friends, is what happens when you let purple dinasours drive buses.
JUST kidding, hell be fine.
moving on :D
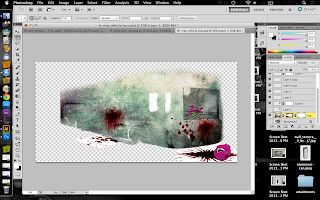
I first started off with various textures that can be used to resemble an old tattered abandoned bus.
This image on the right is of a golden brown rust formation. Textures provide the visual impact in our minds to specify or identify what we are looking at and sometimes even how long it has been around.
To show that the bus has been around for awhile i added this image and did the multiply blend mode to bring the images together giving an old moss texture to the bus.

With the actual image of the bus, this is what we can see, how the texture blended with the bus including the tyres. Moving the image of the bus you can see the added features like blood pools and broken windows.
An abandoned bus isn't complete without shattered windshields and mirrors!
I tried out with several shattered glass textures. Its a different case for every movment for example if you want to show that someone flew out the windscreen, the glass should have a hole in it or if someone had just knocked their head hard on the window you may just need a glass with large cracks like the one above (:
 For a more dramatic effect i then added blood stains and pools! the only way this would be more believable in the poster would be the way you actually place the images of the blood.
The effects of blood like such should show on other places aswell such as the floor, blood drops, as show below.
TWO of the MOST important things to rember when you are working on a computer and photoshop is to:
1. ALWAYS SAVE YOUR WORK
At every step, at every turn, at every click. Save your work before you start, this way there is already a file present whereby you can quickly click 'command + S' [MAC] and your work would be saved.
The reason being that sometimes without notice softwares can crash or close down unexpectedly with all your hard work gone to waste. ALWAYS save.
2. CREATE LAYERS
In photoshop, in Illustrator and where ever possible. This always you to adjust different aspects of your work whenever you want without putting other areas at risk of being altered or being lost.
For another added effect i did a favour of decapitating a purple dinosaur by the head as if it was chuked out the windscreen. I must also add that it sets the mood for the overall creepy yet awesome poster object.
Hope you guys like my movies if i make any in the future based on this (;
OFCOURSE it wasnt the only thing we did in a day, we exaggerated a little more on textures and also the forms of it.
In this exsercise we used an image of a hand and will attempt to add a texture to it. Iv'e decided to use snake skin texture for this.
I used the same method of applying the texture to the hands as so with the one with the aluminium can. Its that simple. The most important element would be the wrap tool.
The texture would be 'wrapped' or positioned from every corner to give a curved and angled effect on the hand.
here are 3 levels or more so the number of times i actually wrapped my texture around the hand. our hand has many complex curves and angles which is why it is needed to be done individually, angle by angle, curve by curve.
Fin. (:


No comments:
Post a Comment